Diving into my 2022 goals and starting at revisiting PowerShell, this post is part 1 of my notes that I have taken while going through Matt Allford‘s “Extending PowerShell” Pluralsight Course. Please head over and check out the course and let him know what you think. There is a lot of indepth detail and knowledge on how to work with PowerShell Modules and context around each of the topics.
Snapins
- Previously Snapins were used back in version 1 of PowerShell – they were adding commands as oppose to modules that hold series of commands.
- Required installation from an installer file and registered to the local machine
- Lacked capabilities like dependencies.
Modules
- Modules – Preferred code package method.
- New
- Comes as a set of files, but some contain DLL files.
- Allows for reuse and abstraction of PowerShell commands
- Package of related commands, grouped together and can be vendor specific so that you only need to load the modules that are required. There are some built in modules that are imported by default and other modules can be added into the Environment Variable to load later on.
An example module available.
Bits Transfer Module
This module contains Get-BitsTransfer, etc. -= none of these commands work outside of bits. But all Get, Remove, Set, etc. are in a single PowerShell module
![]()
Each module is an upgrade to the previous.
Sit in the PowerShell repo
PSModulePath is default, but any location can be used
Copying and pasting a module is fine to import, but there are better ways to install and import
Module Auto-Loading can auto load in modules when you run your PowerShell, but you don’t always want this in case there are conflicting. e.g. Get-VM is both VMware and Hyper-V commands,
-noClobber is a command to prevent conflicting commands from installing when an existing command has already been installed into the session
Install Module (Install-Module)
The Install module does not import the module for use into the PowerShell session, but it does install the module onto the local machine into a path that is in the Environment Variable location, allowing for the module to be either imported into a session later or added into the Auto-Loading.
Using the Install-Module -Name <name> will install the module from the PowerShell Gallery if it exists.
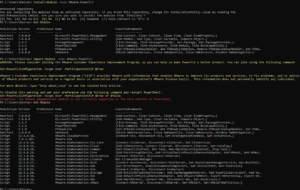
In the above example, once the module is installed, it is not automatically imported. The Import-module needs to be run. As this is running in PowerShell 7 Core, the Vmware.ImageBuilder is not supported and is not imported.
DEMO – Working with Module Paths
To find the PsModulePath, Use the $env:PSModulePath commands. However, you can also add -split “;” to separate out the lines where a semi colon is located.
To add additional default locations for modules, you can add them via $env:PSModulePath = $env:PSModulePath + “;C:\<My module path>”
By adding the semi colon to the start of the location above, this will allow the environment path to see this location as a separate path instead of just continuing the line of the previous path. E.g. C:\Windows\system32\WindowsPowerShell\v1.0\ModulesC:\<my module path>
Setting $env:PSModulePath will only be set for the sessions. In order to make it persistent, it will need to be added to the PowerShell Profile, or added to the PowerShell Environment Variable. This can be done via windows GUI or through Powershell
Start by creating a new variable
| E.g. | $currentPath = [Environment]::GetEnvironmentVariable(‘PSModulePath’,’Machine’) |
| $currentpath -split “;” | |
| New path | $newpath = $currentpath + ‘;C:\<my module path>’ |
| [Environment]::SetEnvironmentVariable(‘PSModulePath’, $newpath, ‘Machine’) | |
The above commands are first creating a cmdlet with the environment set. This will then allow the second command to run and list out the existing paths already set in the system environment variable path.
The 3rd lone is creating a new cmdlet that is adding both the existing system environment variable paths and the new path together (hence the + sign) – keep the semi colon prefix in mind
The last command is setting the System Environment Variable path to include the $newpath cmdlet. You need to make sure you add the previous Environment Variable location and cmdlet together with the new path each time to ensure the complete PATH is set.
DEMO – Importing and Auto Loading Modules
How modules get imported explicitly and automatically.
First run Get-Help Import-Module to view the mandatory parameter.
– Only required is -name
Run Import-Module -name <name of module> to install the module.
Auto-loader
The auto load feature is used when a cmdlet has been run that is part of a module that has not been imported but is sitting in a module that is located in the Environment Variable Location. Powershell will search for the required cmdlet and import the module
Auto load won’t work if the module is not sitting in one of the Paths in the PS Variable Path.
Below in the example, using the command Get-SmbShare searches for the module and then auto loads the module as it is an available option.
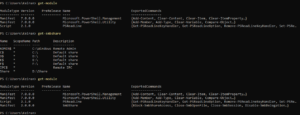
Import a module that is not in a Environment Variable location
In the event you have a module that has been downloaded to another location that isn’t in the Environment Variable location, you can easily import it using the full location path in your import command.
Import-Module -Name C:\<Path to file>\
e.g Import-Module -Name C:\PowerShell\Module
Use Import-Module to import with a prefix
As above, we mentioned the -NoClobber parameter that will skip any commands in a module that are conflicting with an already imported module. Another method to avoid a conflict is to add a prefix, allowing the commands to be imported uniquely into the session.
In the below example, SmbShare is already loaded and does not contain a PreFix (Block-SmbShareAccess)
The Module is then removed and then Imported back into the session with use of the -PreFix parameter.
This will now add the prefix of “Pre” to the front noun in the command. (Block-PreSmbShareAccess)
So when running the command after importing with a prefix it will need to be,.
C:\> Block-PreSmbShareAccess
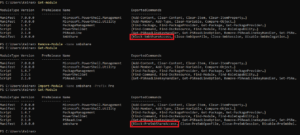
Demo – Indentifing Commands in a Module
Running Get-Command is not a great way to search for a particular command in a PS module. This will load every command that is available. This is far from ideal.
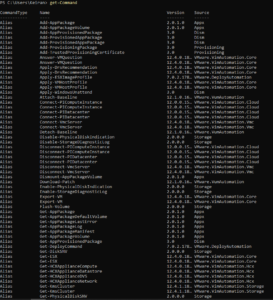
If you run Get-Command -ListImported This will only show you the commands for, you guessed it, the commands only available in the modules that are currently imported into the session.
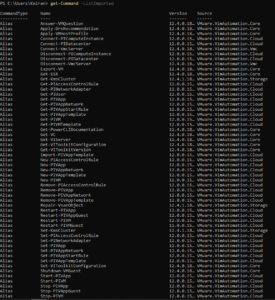
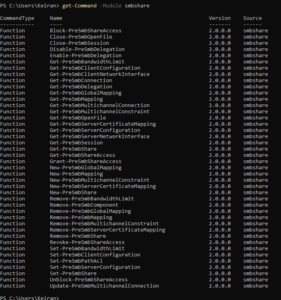
In order to only find the commands of a particular module that is currently imported and not receive commands for other modules, then using the -Module parameter will cut this list down to only those commands that are required.
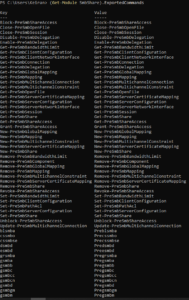
Alternate to getting the commands for a particular module is to use the Get-Module SmbShare – however, this will only listed some of the commands off to the side under the “ExportedCommands” column.
To view this better, use the (Get-Module SmbShare).ExportedCommands to display this in a nicer way with also the key and value columns.
Finding a command by using the Verb
Using the PowerShell Verb-Noun layout, there may be times that you want to do a particular action and know that the verb you need to perform the action. You can search on the verb that is part of the module to get a list of the commands that are available to help narrow down to the right one. This is done using the -Verb parameter followed by the verb to search for.
Get-Command -Module SmbShare -Verb Remove

Finding a Command by Wildcard
There may be a case where you only know a part of the command that you are looking for and need to perform a wildcard search. This works by still using asterixis on both sides of the word you are looking for.
Get-Command -Module SmbShare *Access*



1 thought on “Extending PowerShell -Matt Allford – Pluralsight Course Notes – Part 1”